
Multiply's iMovie '09 Guide
WARNING: If I have made any spelling or grammar mistakes, please leave a comment or PM me and I will fix them. This guide was written totally by me. I do not give permission for this guide to be posted anywhere else without my consent.
Phewf.... At last, we can start.
Contents
-Welcome
-Importing Clips
-Basic Arranging
-Audio
-Effects
+Video Effects
+Transitions
+Text Effects
-Exporting
WELCOME
Welcome to my iMovie guide. Hopefully, I will be able to teach you the basics of iMovie and how to use it. iMovie is Mac only, sorry Windows users, buy a mac? When you first open up iMovie you need to know about it's interface. So examine the diagram I've made.
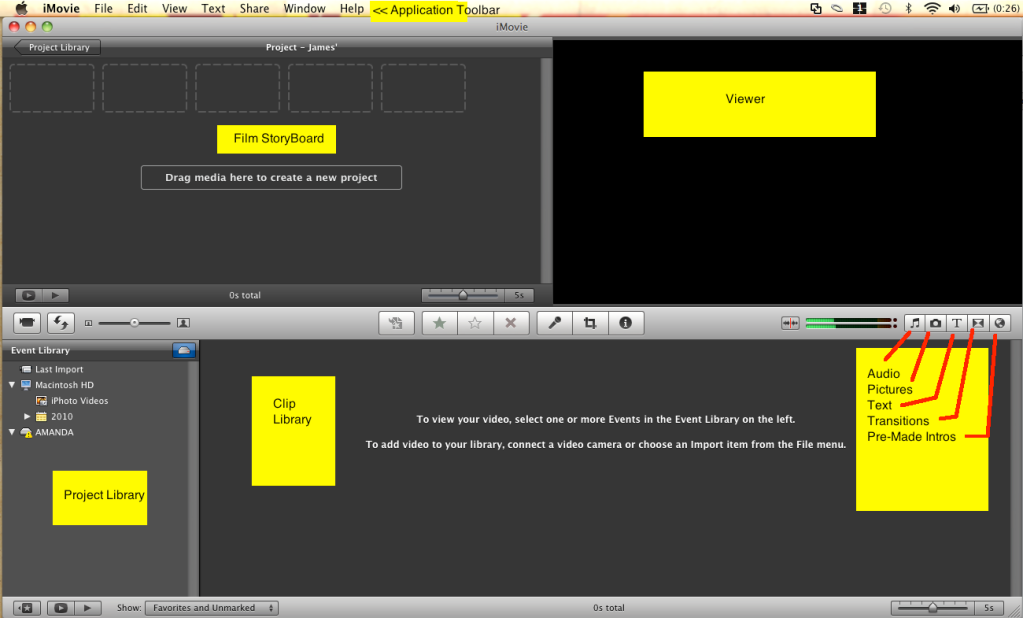
What do all of these wonderful things do? I'll tell you
Application Toolbar - Where you can control everything.
Project Library - Where all your past films are stored.
Clip Library - Where all the clips you're using in your current film are kept.
Film StoryBoard - Where everything which will be in the final movie is kept. (e.g Clips, songs, effects etc.)
Viewer - Where you can view your story board.
Effects - Explained later in detail.
Ok, now you know you're rough way around, we can get into some more detail
IMPORTING
You can import any clips you have through the application toolbar.
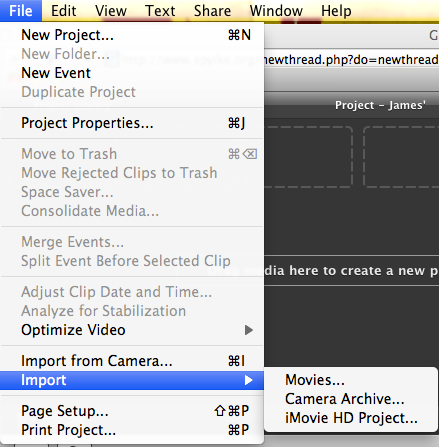
Depending on what type of clip you have, will the button you press. If it's something filmed with a camcorder, camera, hypercam, PVR etc, you just click on 'Movies'. If you camera is plugged into your computer, you can click on the option above (Import from camera).
When you've imported all the clips you want, they will appear in your clip library.
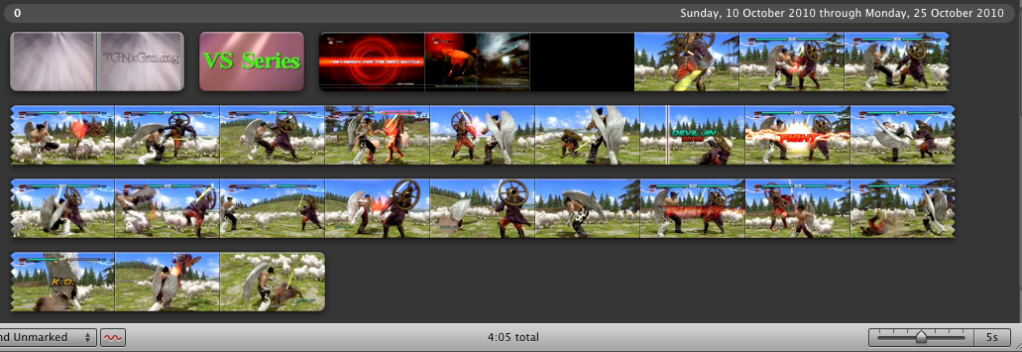
I've used some of my Tekken 6 gameplay as an example
At the bottem, it will tell you the total length of all the clips combined.
BASIC ARRANGING
Ok, so once you have all of your clips you've filmed into the clip library. You need to sort them out. First of all, you have to 'slice' the clip. This basically means removing the bits you don't want. For example if at the start of the clip the camera is really wobbly and filming the grass.

This is one of my clips. By drag'n'holding your mouse your can select bits of it, the bit you select will be inside a yellow box. Make sure you put the bit you want to delete inside the box. When you have got the box positioned, just press backspace on your keyboard, and the section inside the yellow box will be gone!
Once you've done that to all of your clips, drag them onto the storyboard in the order you want them to be in your film.
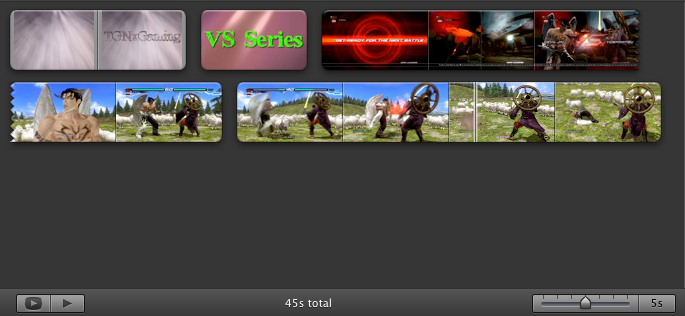
Well Done! You now have a 'rough cut' of your film!
AUDIO
Despite what many people think, Audio is actually crucial to a film! Most people make an amazing film then just slap a song on top. I can't help you pick a good one, but make sure you pick audio early on, and make sure your film fits in with the songs beat etc. Kind of random, but I'm part of a film club at school, and once we had to listen to a 45 minute audio track to help us understand the above point!
Anyway! To get up audio you need to click the audio button on the effects menu, highlighted pink in the below image.
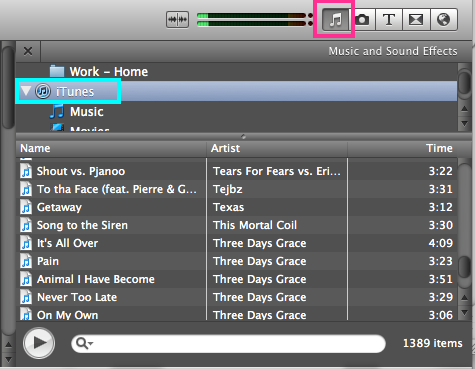
From there, you will have two choices, either some built in sound effects, or your own music from iTunes. I'll first run over iTunes.
*iTunes
Ok, I've highlighted it blue in the above image. From here you will have your whole iTunes library. You can pick any song you want and drag it onto the story board.
*iLife Sound Effects

You click on the button, then a drop down will come up with different 'genres' of sound effects. Just pick the one(s) you want and drag it onto the story board.
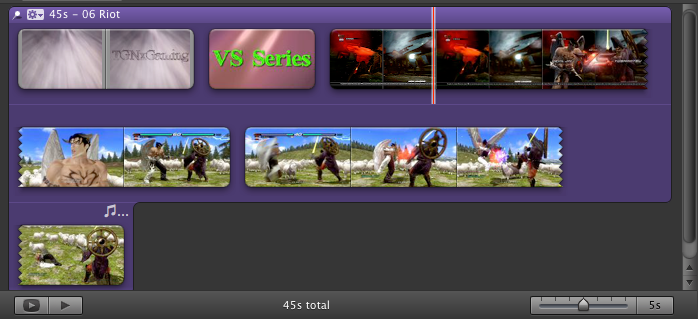
Once you've finished dragging the audio you want onto it, it will look like the image below. You can edit the length of the audio etc by doing the same 'drag'n'hold' technique I talked about it video.
VIDEO EFFECTS
Now it's time to make your film look fancy and flow well! In my opinion, this is the most fun bit
To start it off, I'll be showing you how to change the actual image.
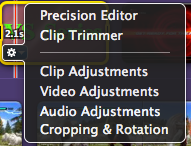
When you hover your mouse over a clip in the storyboard, a little cog will appear in the bottem left hand corner. If you click on 'Clip Adjustments' a menu will pop up.
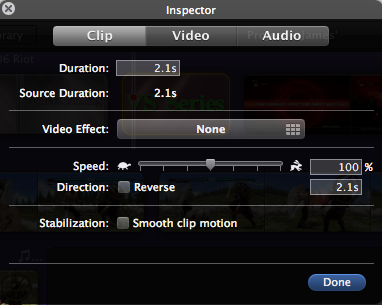
This is the video effect menu. By clicking on 'video effects' you can add various different effects, and by dragging the speed arrow up and down you can control if the clip is played in slow motion or fast motion.
TRANSITIONS
Transitions are primarily used to make your film 'flow' better. They look really great. My only advice when using them is not to over use.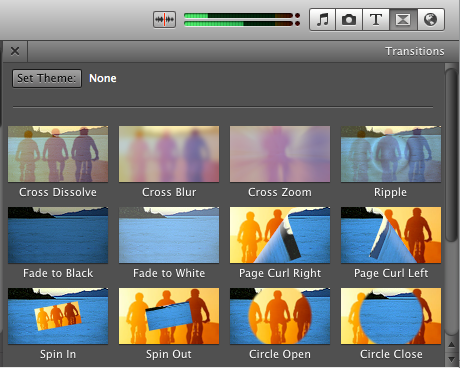
You can access the transition menu by clicking on it's symbol in the effects bar. This will bring you up with all of the different ones you can choose from. Once you have chosen a suitable one, all you need to do is drag it in-between the two clips you want it in-between.

^ It should appear like that in the storyboard.
TEXT EFFECTS
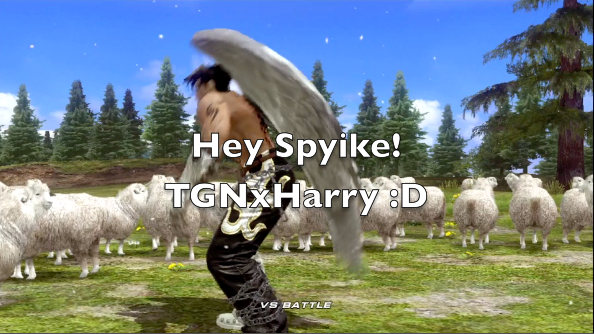
Text effects can be used at various times during your movie and can make it much more interesting for the viewer. Mainly, they are used at the beginning and end.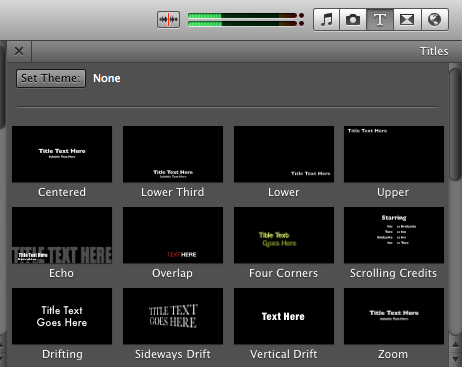
They can be accessed the same way as all of the other effects and are used in the same way. Just drag and drop.

EXPORTING
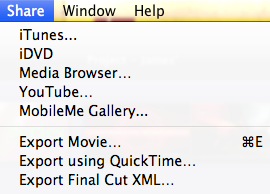
The 'Share' button is in the application toolbar. Because of lovely Apple, they've made exported incredibly easy! So there's not much I need to explain! However, if you are having any trouble at all with it, feel free to ask a question in the comments below.
Thank you everyone for reading my guide. I hope you enjoyed it, if you've noticed any spelling/ grammer mistakes, please PM me or leave a message below and I'll fix it up ASAP.
Take Care y'all.


